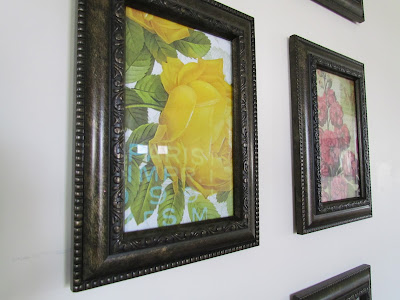
I LOVE how this turned out. It is one of a kind art and was sooo simple! The great thing about it is the flexibility, you could use anything from calendars, to antique prints, to your kids art work (or photos, duh). And of course you could make more than twelve, or different sized frames. When you put them all in the same frame they come together.
Supplies:
1 Calendar with artwork you like
12 frames (mine are from Dollar Tree, 4x6)
Pen or pencil
Scissors
 |
| I found this calendar at Michaels last summer. I loved the vintage style artwork, and it was only a buck! |
Remove the glass pane from one of the frames. This will be your template for cutting the artwork. Simply move the glass around the page until you find a section that you think is pretty :) Hint: Having words or images perfectly centered can be a bit boring, so try some variety and have some parts "cut off".
Once you've found a section you like just trace around the glass and cut it out.
I ended up cutting out more than I would need, then I just chose my top faves ;)
 |
| Pretties! |
Once you have 12 that you like just pop them into the frames.
 |
| Random dog butt. |
Then play around with the order and placement. I tried to be sure that the color schemes were evenly spread out. Once you've got that down hang em up! Voila!
 |
| Remember those pillows? |
Big shout out to my frind Kari at Cupcakes & Cocktails for her assistance with this project. I would have never gotten them hung up without her ;)
I'm linking up to
If you have a project be sure you link up so you can be entered to win one of these!
Until Next Time,
Barbie


how DID you get them hung up so perfectly? lol
ReplyDeleteBelieve it or not, I did math lol. I wanted two inches in between so I measured out the width it would need to be and marked where the top row would go. Then I did the same thing going down from each mark to be sure the next rows would line up. For a more fool proof and flexible technique I would use math + the command picture hangers. They are great, I use them all the time, I just didn't want to spend the money on a bunch for this.
ReplyDeleteWhat color you've brought to your wall. I love this project.
ReplyDeletePlease drop by our blog to enter a giveaway for six antique blue jars at www.theoldblockhouse.blogspot.com
gertie
Looks great. My wall art is in the works. I love the pictures you chose. It turned out great. I plan to use scrapbook paper in my frames. Can't wait to get it finished now that I can see how great it will be.
ReplyDeleteHey Barbie!
ReplyDeleteI just tried this awesome craft and I'm happy to say it turned out great!! I already had frames in boxes from the move, and I went to the Dollar Sore for something to put in them. I found a really pretty gift bag that I cut up and put in the frames. It brings sooooo much to my bare walls lol.